But iPhone’s malware resistance won’t protect you from thieves, hackers, and nosy family members. And it certainly won’t stop you from blindly allowing sketchy apps access to your photos, contacts, or physical location.
So, whether you’re setting up a new iPhone or have been using Apple’s popular “Internet communicator” for years, be sure to follow these 7 tips for maximum security and privacy.
1. Update your iOS
This is probably the most important — and easiest — thing you can do to stay safe and keep your iPhone running smoothly. iOS updates fix bugs and security flaws that put your private data at risk.
Updating your iPhone or iPad is the most important thing you can do for your security
The recent Broadpwn vulnerability is a prime example of this, and was thankfully fixed with the iOS 10.3.3 update that Apple released July 19, 2017. Broadpwn, a flaw in the Broadcom Wi-Fi chip used in iPhone and many Android devices, would have allowed a hacker to remotely take control of an iPhone within Wi-Fi range and even use that phone to infect other nearby iPhones. That’s scary stuff. And that’s exactly why iOS updates are so essential.
iOS updates are also tailored to specific iPhone models to avoid crippling older iPhones with the newest, processor-hungry features. So be sure to install any iOS update you see.
Where to check for updates:
Settings > General > Software Update
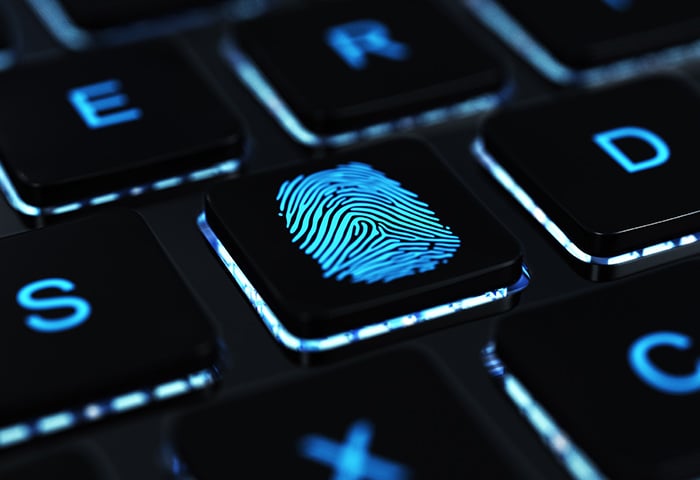
2. Use a passcode (and Touch ID)

This one’s a no-brainer. Your iPhone knows all about you. It’s your wallet, photo album, and address book — a goldmine for criminals. Thankfully, 6 little digits is all it takes to keep those guys out.
“But passcodes take too long to type!” you say? No, they don’t. You can do it in 2 seconds flat, and it becomes second nature after only a few times. Also, would you ever say this about the locks on your home? “I don’t lock my doors because it takes too long to unlock them.” No, because those extra seconds are a very small price to pay for securing your home.
And with Touch ID enabled, you’ll rarely have to type your passcode, anyway, so there’s really no excuse for not using one (though Touch ID comes with its own tradeoffs).
When you do use one, make sure it’s the longer, 6-digit passcode, which is 100x better than the weaker, 4-digit one. (6 digits = 1,000,000 possible combinations. 4 digits = 10,000 possible combinations.)
Where to turn on your passcode:
Settings > Touch ID & Passcode
3. Turn on Location Services
You’ll be asked if you want to do this when setting up a new iPhone, and our advice is to do it. It’s one of the best reasons to own a smartphone: useful for navigation, finding nearby restaurants, getting local weather alerts, etc.
You can't find a lost iPhone without enabling Location Services
Most importantly, Location Services are necessary for tracking down your lost or stolen iPhone. And if your battery dies? No sweat. Your iPhone can even send you its last-known location just before that happens.
You also have complete control over which apps can and cannot access your location, and when. For example, you can allow your Weather app to use your location to display local weather info, but hide your location from Facebook. (Read more about individual app permissions in tip #4.)
Where to find Location Services:
Settings > Privacy > Location Services
How to turn on Send Last Location in case of loss or theft:
In iOS 10.3 and iOS 11: Settings > [your name] > iCloud > Find My Phone
In iOS 10.2 and older: Settings > iCloud
How to reset all Location Services to default:
Settings > General > Reset and tap "Reset Location & Privacy"

4. Carefully read app permission requests
Don’t be lazy on this one. If you install a calculator app, and it asks to access your photos or location, something’s up. The great thing about the iPhone, though, is that you control which data each app can access. Permission requests pop up the first time an app tries to access something, and it’s up to you to block or allow it. Your iPhone will remember your choice from then on.
If you ever change your mind, you can always visit your Settings to undo it. In fact, we recommend occasionally reviewing all app permissions to be sure you (or your kid) didn’t accidentally allow something you shouldn’t have.
Where to find which data your apps have access to:
Settings > Privacy
5. Turn on Two-Factor Authentication
If someone ever gets your Apple ID password, they’ll have access to your entire account, and can even buy music and apps in your name. Two-Factor Authentication adds another layer of security to prevent this.
A password and a pin is better than a password alone
In a nutshell, anyone who tries to log in to a new device with your Apple ID and password must first enter a 6-digit verification code that’s sent to one of your other devices. Without that code, no one can log in to your account — even if they have your password.
Where to find Two-Factor Authentication:
In iOS 10.3 and iOS 11: Settings > [your name] > Password & Security
In iOS 10.2 and older: Settings > iCloud > [your Apple ID] > Password & Security
6. Use a VPN

OK, so this one may cost you, but it’s worth it for the security and privacy you’ll get. A VPN (virtual private network) encrypts your entire Internet connection so you can securely use any Wi-Fi network (even unprotected public ones).
With a VPN, no one can eavesdrop on what you do online, and websites and ad networks won’t be able to see your real location. In fact, you can change your location to appear to be nearly anywhere in the world — immensely useful for accessing your favorite videos when traveling.
But be careful about which VPN you choose. You’ll be sending all your Internet traffic (including passwords and credit card information) through the VPN’s servers, so be absolutely sure you trust the developer before using their VPN.
There's no such thing as a free lunch. Especially with VPNs
Be wary of free VPNs, too. It costs a lot of money to maintain the servers needed for a VPN, so trusted VPNs are rarely free. Read app reviews before installing to see what other people say about the VPN, and avoid those with too many negative reviews.
Also, look at the app description itself. A poorly written description with tons of typos is a warning sign that the company may be a scam. (Learn to spot scam apps in tip #7.)
Where to find a good, trusted VPN:
Download AVG Secure VPN for iPhone or HMA! Pro VPN for iPhone. They both offer free trials, so you can test them out before buying. And be careful of fake or unknown VPNs (see tip #7).
7. Avoid scam apps
The App Store is pretty good about filtering unsafe or scam apps, but they can still slip through. So keep an eye out for anything suspicious.
Read app reviews before installing. If thousands of people are leaving bad reviews, you’re probably better off looking for another app. Look for poorly written app descriptions, too. A legitimate company would probably have the resources to properly write (and translate) their descriptions.
Before installing: check for bad reviews, poorly written app descriptions, and when in doubt Google the developer's name
Never heard of a developer before? Google their name to learn more about them before trusting their app on your phone. Once installed, make sure the permissions the app asks for make sense, and don’t allow the app to access anything you aren’t comfortable with. (Learn more about app permissions in tip #4.)
In short, know what you’re installing. You’d never let a complete stranger into your home. Why invite an unknown app onto your phone?
Bonus tip! Lock down your Lock Screen

I’m adding this as a bonus, because while it’ll maximize your security, it’ll also make your iPhone far less useful. So there’s no shame in ignoring this one. After all, it’s up to you to choose the right balance of convenience and security. That said…
Saying “Hey, Siri!” is super convenient for making calls and asking for information when your hands are tied. And having new emails or text messages appear on your lock screen lets you quickly read and reply to friends and family without having to unlock your phone.
But others can use both features against you to make calls, access your private data, and snoop on your messages while you’re away from your phone — even if the phone is locked. If that’s a risk you’re not willing to take, we suggest you disable both features from being used on your lock screen.
Where to disable these features:
Settings > Touch ID & Passcode > Allow access when locked


/Signal-What-is-SQL-injection-Thumb.jpg)
/What-is-a-browser-hijacker-and-how-to-remove-them-Thumb.jpg)